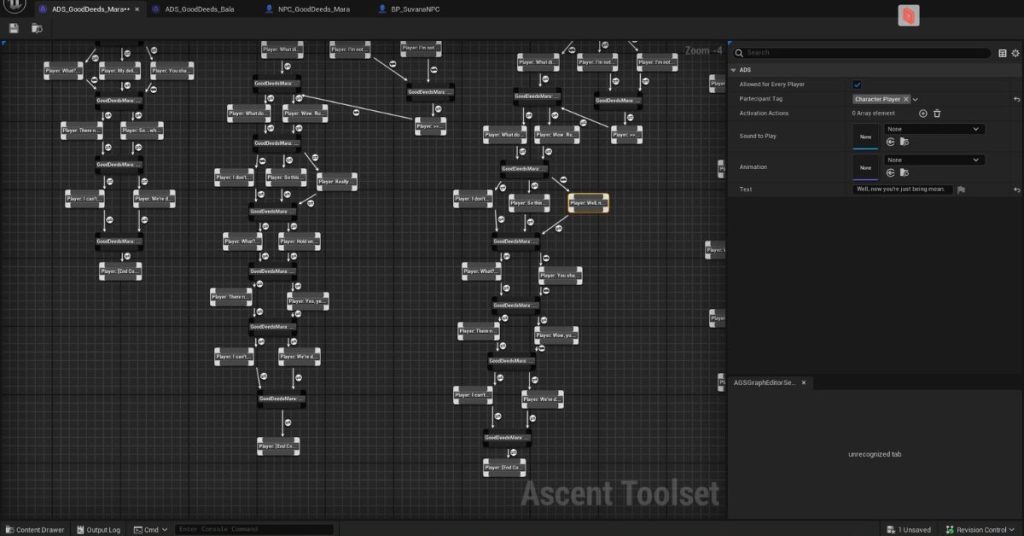
To bring my level The Sheltered Descent up to external demo quality, I revisited it to add new areas and improve the existing flow and aesthetics. I also implemented my quest and dialogue in full in Unreal Engine 5, so that the level was a fully playable experience with two new NPCs and a questline to complete.
Earlier this year I completed The Sheltered Descent, a playable level in Unreal Engine 5. Over the last couple of months, I’ve had the chance to work on the level a bit further, doing an additional art pass as well as making further adjustments to its overall flow and gameplay. To accompany the level, I also designed and wrote a branching quest called Good Deeds. This quest gives players an incentive to explore The Sheltered Descent to the fullest. It features two new NPCs, both of whom I designed and wrote dialogue for as part of my quest design work. These clips show a brief overview of the implementation work I did on this.
To get the level closer to external demo quality, I recently completed the process of implementing the quest and dialogue into Unreal. I did so using a framework that was new to me, the Ascent Toolset. This was a new technical step up for me, and it wasn’t without its challenges! However, I successfully implemented my quest and dialogues using the following workflow.
Documentation
First I did as much reading as possible on the toolset and the framework it forms part of, the Ascent Combat Framework. This probably wasn’t the best start to the process for me, as the existing documentation is a bit thin on the ground. Still, I tried to absorb as much information as I could from that before jumping into the editor.
Quest Graph
My first in-engine task was create a quest graph. This let me visually lay out the steps my quest needed in a clear, node-based format. I kept this really simple, despite my quest having multiple outcomes depending on which dialogue branch the player chooses.
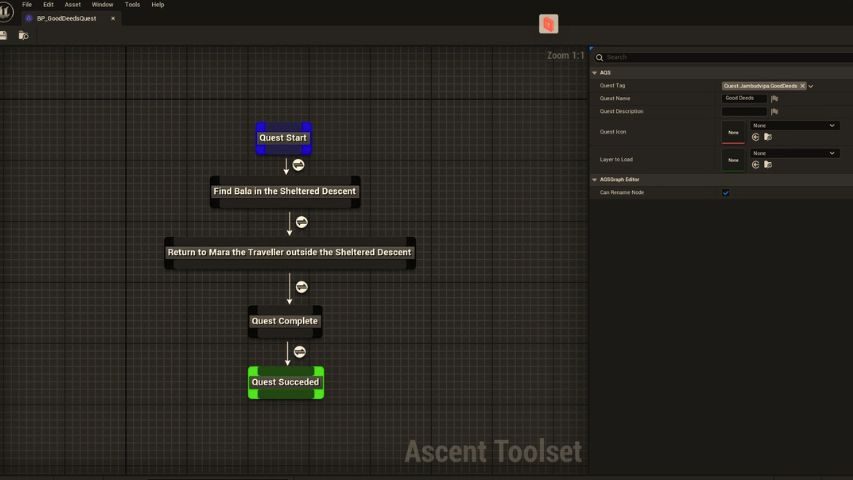
I thought that I’d be able to work that all out in the dialogue tree, and that the quest’s ending (one way or another) would need to be the final objective node on the graph. As it turned out, that was right, so this part of the process wasn’t too tricky. Setting up the quest’s specific objectives and data table was a bit more complicated, so I got some help from a colleague on that part.
Creating NPC Blueprints
With the quest graph in place, I then created two new NPCs using the character blueprints that existed in the project already.
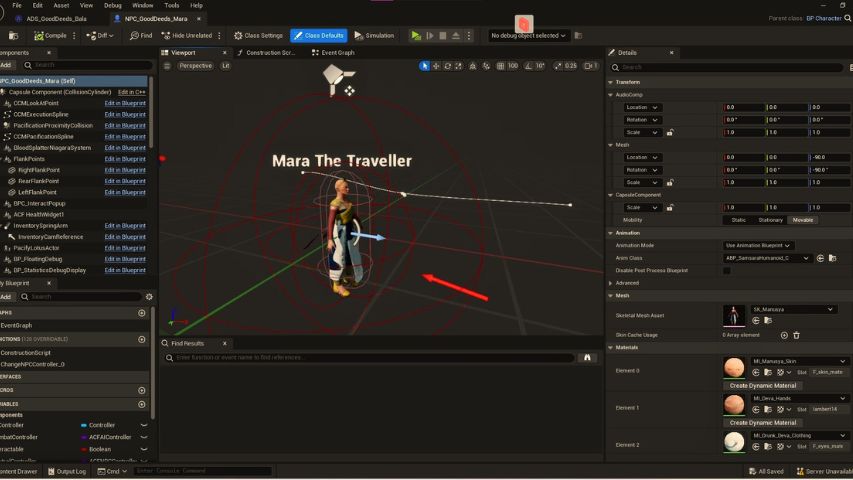
These were my quest NPCs Mara and Bala, who are actually two versions of the same character. It’s a storyline with a shapeshifter, so it makes sense narratively even if it was additional work to create two characters. Anyway, I tweaked their core looks a little and assigned them to their respective dialogue graphs, once I’d made them.
Creating Dialogue Graphs
I then set up two dialogue graphs, one for Mara and one for Bala. This part of the process was quite time-consuming and at times challenging. There was a lot of trial and error involved in getting the conversation trees to fire at the correct times and updating only if certain conditions were met.
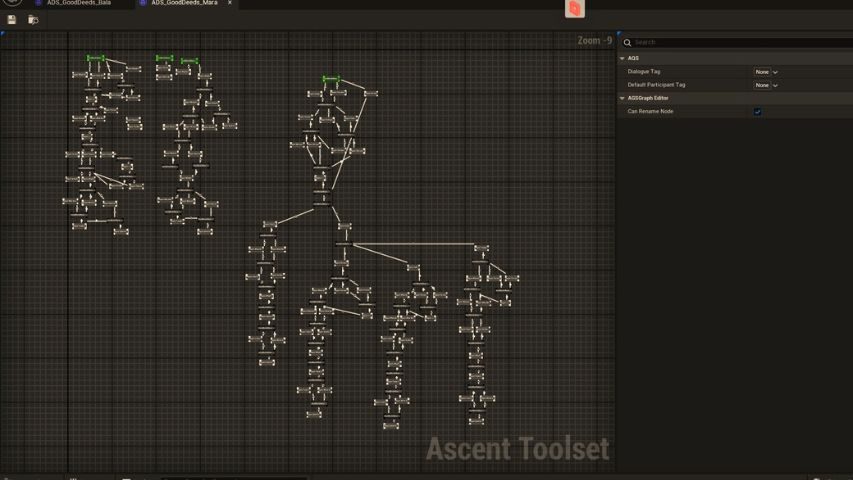
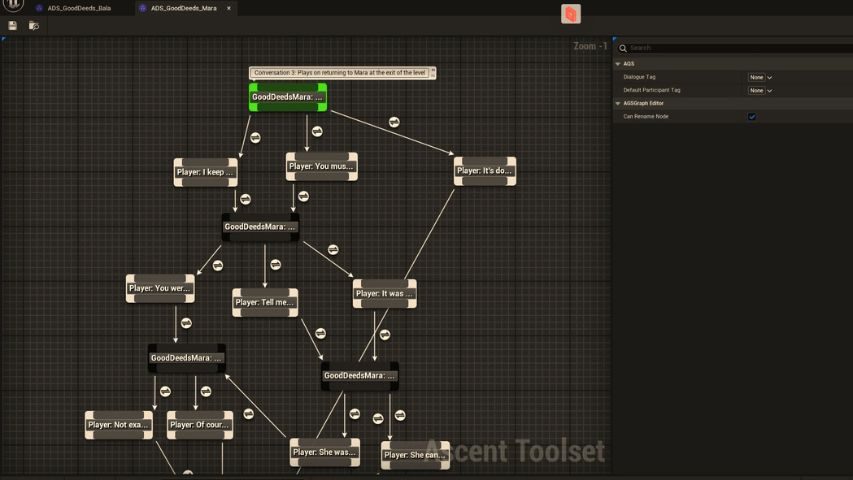
As this was the first time I’d implemented dialogue with this tool, there was a bit of a learning curve, especially as there wasn’t a great deal of documentation to fall back on. However, with everything mapped out and the objectives all linked up, it was exciting to see the characters ‘speaking’ the lines I’d written months earlier.
It was interesting as well, considering that when I wrote the quest I hadn’t yet made the blockout so I didn’t know what the level would actually be like. Doing the dialogue implementation for the quest gave me the chance to tinker and reshape some of the dialogue lines to better suit the environment I’d since created.
Testing
With everything laid out in the graph, I started to do a lot of testing. Needless to say, there were a fair few quirks to iron out, especially in the first few rounds of testing! It was easy to spot where a dialogue flag check hadn’t quite worked; less easy was figuring out how to fix it. However, the vast majority of the dialogue was implemented correctly and was fully functional. I just needed to work out how to make the different outcomes work at the quest’s conclusion.
Adding new VFX and combat encounters
Implementing the Good Deeds questline also gave me anoter opportunity to work with Unreal blueprints. Depending on the outcome of the quest, the player may be faced with a combat encounter, or the end NPC vanishing in a magical swirl/puff of smoke. However, it became evident that this effect didn’t exist, so I worked with the game’s main designer to create a new particle effect blueprint that would do this. I could then add that as an activation action at the end of one of my NPC’s dialogue nodes, making them vanish into sparkly thin air once the conversation concluded.
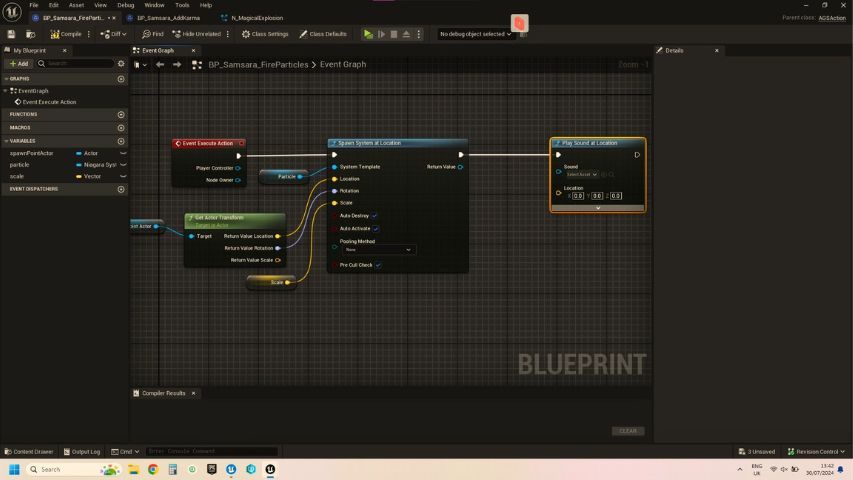
I also put target points for a number of enemy AI to spawn at (or move to, more accurately) when the quest concluded a different way. This was quite a challenging but fun part of the process, as it enabled my implementation to feel a bit more interactive than static conversation. Some of this process is shown in the second clip at the top of this post.
More testing
This ending segment took a lot more testing, as I needed to ensure the vanishing effect and the combat encounters worked correctly. I also realised that the second NPC needed to only appear if the player actually spoke to the first one at the entrance to the level. To do this, I added another ‘move to’ condition, a bit similar to the enemy AI one.
If the player ignores the first NPC (Mara) and just goes to explore the level, the second NPC (Bala) won’t spawn in the position she’s meant to be in. If they return to explore it later, they can speak with Mara at the level’s entrance as the quest will still be available to them. On accepting the quest, Bala spawns in the correct position in the lower caverns.
what this experience taught me
This was the first time I’d done quest and dialogue implementation in Unreal. I think it gave me a better technical understanding of narrative functionality and how it intersects with mechanics such as combat and aesthetics. I also discovered that having clear documentation when it comes to narrative tools is incredibly important. That clarity can significantly reduce stress and challenge levels for the uninitiated, and probably even for experienced developers.
I believe that I also learned more about designing dialogue with implementation in mind. The process strengthened my understanding of cause and effect design. By that I mean it made me consider the importance of narrative systems that make sense, not just from a creative or storytelling perspective, but from a technical one too.
Finding the right tool for the job seems to be something of a sticking point when it comes to narrative work in game engines. I hope to explore different methods of quest and dialogue implementation for Unreal, as this has given me a strong foundation on which to build further. Mostly, the experience taught me to make something that works, and that to do that, sometimes you just have to dive in and tinker about until you figure it out.